Tuesday, May 17, 2011

101: Turning the tables

The table is getting it's first coat! Looks super dark, but I'm sure it will lighten up.

100: (Holy crap 100!!!) The Drunken Octopus

Isn't that the most awesome drunk octopus you've ever seen?!?! This coat / scarf / key / whatever hanger was a snap (with some liquid courage, power tools and a trip or two to The Depot.)

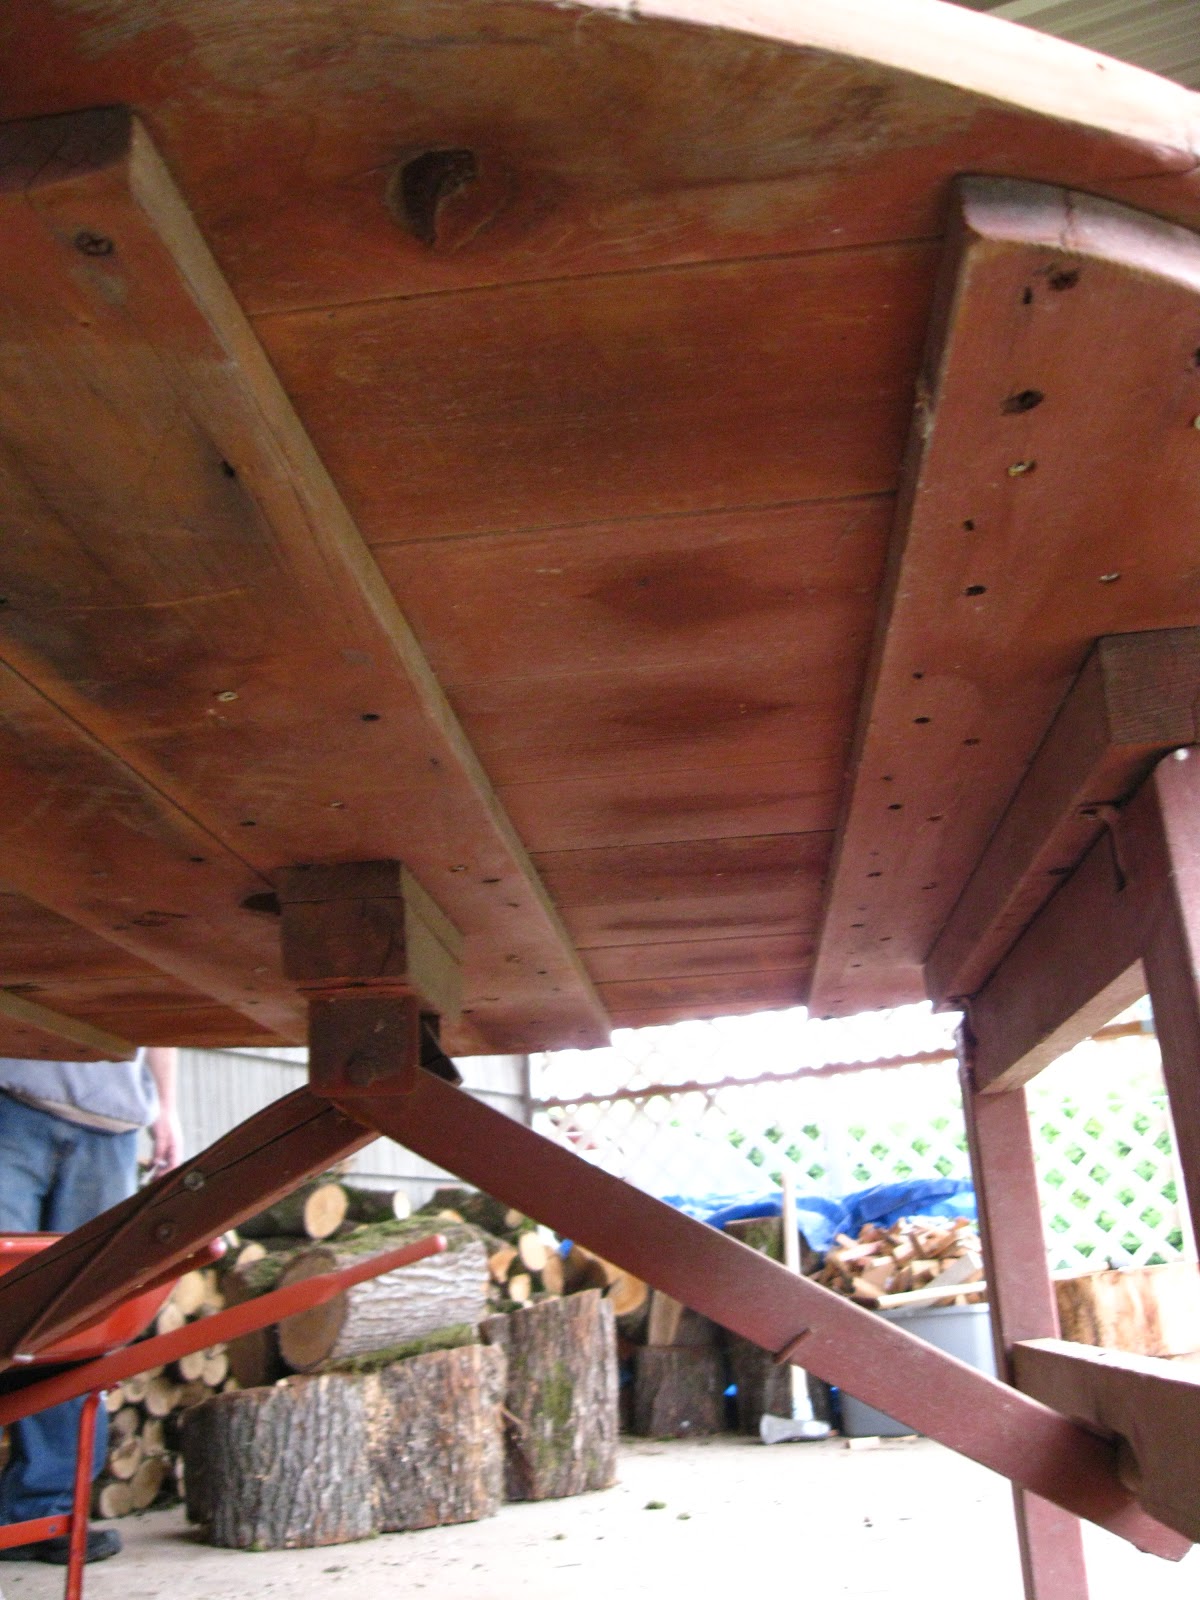
Step 1: Find some old crappy frames in your attic that your loving sister-in-law-to-be for whatever reason sent home with you after Thanksgiving last year.
Step 2: Scrub the spiders off and sand down to roughen it up a tad. Don't worry, we like it rough... Mine had some canvas looking material glued onto one of the levels of the frame. Came right off with some water and a little tugging.
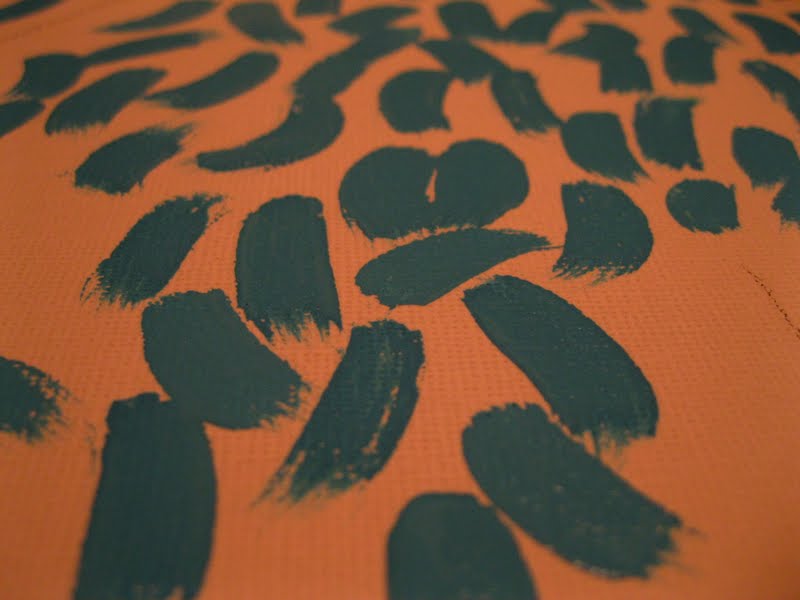
Step 3: Paint. 
Step 4: Admire your handiwork. 
 Step 5: For the backing, I used some plexiglass I found from an old sign at work. Sanding it down so the paint adheres is a good idea.
 
Step 6: More painting
Step 7: More drying time!!
Step 8: Fastening everything together. Handy dandy Brads to secure the plexiglass to the frame
Like so...
Now that looks much better
Step 9: Bolt down the drunken octopus in the center of your frame.
Give it all another fine coat of paint, attach some hangars on the back and like magic, you've made something awesome! 
 Better get yourself a congratulatory beer ;)

99: I had faith, but I put a bird on it instead

I found these at Joann's on sale. Now I have faith and all, but I couldn't really see myself wearing these around. I took them home (Yes, I paid first!!) peeled off the puffy stickers and was left with shiny little boxes that were screaming to be made into something awesome. 
Diamond Glaze and scrapbook paper you say?! 
....
Cut your paper to fit just inside the boxes and glue them down. Carefully put a coat of Diamond Glaze over the top, taking care to not make bubbles. You will be inclined to shake the glaze before using it. RESIST THIS URGE! Bubbles in this stuff will make you go crazy. You can pop them with your fingers, or sometimes get them to the edge of the project and sort of scoot them off, but either way it's a hot mess. So, NO SHAKING!
Make sure you let them sit flat overnight. The opaque you see above will dry clear. 
 
Much better if I do say so myself.

Monday, May 16, 2011

98: I love your guts

Sharpie on matte photo paper - I love these squiggles. This one in particular (in girly fru-fru pink) is one single squiggle. Like guts... sexy pink guts...

97: Blossoms

I'm a huge fan of cheap. Paint, canvas, any sort of art supplies really. Joann's frequently has their paints on sale for 50 cents and when they do, I stock up. Caribbean Coast isn't a color I'd usually oodle over, but I've been thinking about how to paint a request for cherry blossoms I've had for a few years, and finally got a glimmer of an idea. 
Large brush strokes for a base
I'd penciled out where I wanted my branches and added some darker colors.
Just so there was no white in the background, I blended in some blue where the branches should be. But keeping it blurrier than the rest shows me right where I need the next layer.
Using another darker blue and some white also, I covered the canvas.
 Putting down a layer of pink base petals, I then added a lighter outline over each one, put some brown branches in, some white spires or pestals or whatever that part of the plant is called, a coat of shiny sealant and dropped it in the mail to my girl. 
The light pink sure lightens it up. I added some shiny green leaves also for some additional color.

96: And for the little guy

Upon my endless quest to get to the end of the internet again, I found this and decided I knew just the little guy who would like one. And no matter how many times I try, the bleepity bleeping picture won't blog straight.  MOVING ON!
Go to her website and you will find the template for this:
Three pieces of paper to print the pictures, an Altoid tin to hold it all and some modge for the cutest little portable treasure hunt around!!!

Thursday, May 12, 2011

94: The tale continues

LET THE SANDING WARS COMMENCE!!!
Just kidding - I totally won remember?!
The table had a few rotten spots. A little wood filler works wonders. 
......................

I totally forgot to take pictures of the filled wood. Picture it in your head... we're moving on. 

The leg assembly was pretty ingenious. There were two separate legs, one for each side (duh), and a big spring loaded brace thing that hooked into place on each leg, keeping it sturdy. With the legs, you'll notice one is longer than the other, this is because the shorter leg is mounted under the table on an extra piece of wood making it the same length as the longer legs. The longer legs are mounted directly under the table. That way, it sits level when it's open and when it's folded up, the legs lay flat together.
  The boy was kind enough to take the old legs off and fab some new ones. It was really wobbly before and there is no way anyone could have... never mind... The spring braces had cracked and been sort of screwed back together, so he rebuilt those too.  
We still have to put it all together and make sure we notch correctly for the spring braces. Throw a layer or three of top coat and it'll be ready for backyard movie night in no time!

93: A little extra dingle to your dangle

Well one dangle looked pretty, but what if I made a pair with two, count 'em TWO dangles?!?!

That's the stuff :)

92: Bluebells

Simple wire and blue single dangle earrings. They actually have a touch of green in them too. 
See I told you so!

91: Now what do I do with 87 million markers?

Remember how I made paper pots? With miracle grow in the paper? Now I have to back and make sure I posted about that................ YES! #81. Check it if you missed out. Well, it being spring and all, I planted some seeds and needed some markers in them to remember what was what. I have PILES of extra blinds that I removed in my "shortening-of-the-blinds" day (who puts in 6 foot long blinds in 3 foot tall windows anyhow?!?!). Putting them to good use, I cut 7 inch pieces and using my trusty sharpie, labeled each pot. 
  Like this
 and this
Dill yo
 and this
and even like this


Speaking of plants, my basil smells like cat pee. 
It's growing amazingly for being a store bought hydroponic use-once plant from the grocery store. It's quite tasty too, but it smells funny :(
And will have to be relocated outside quite soon!